
Peel-and-Stick Countertop Overlays That Look Like Real Stone
Today we’re exploring peel-and-stick countertop overlays with a clear eye on durability, food safety, and how convincingly they capture stone’s character. Expect straightforward guidance, real-world expectations, and design strategies that help renters, renovators, and busy families refresh kitchens quickly without demolition, heavy tools, or messy curing windows, while staying mindful of daily cooking habits, cleaning routines, and long-term maintenance that keeps surfaces looking beautiful and performing dependably.

Materials and Build
Most overlays use vinyl, PVC, or PET base films topped by wear layers and protective urethane or acrylic coatings that resist stains and scratches. Adhesives are usually acrylic and pressure-sensitive, designed to set firmly after rolling. Thickness varies by brand, influencing feel, conformability, and edge coverage. Look for low-VOC, phthalate-free claims and consult product data sheets for temperature tolerances, recommended substrates, and compatibility notes when bonding over laminates, sealed wood, or previously painted counters.
Surface Prep That Lasts
Lasting results begin with meticulous cleaning, degreasing, and smoothing. Remove silicone residues, scuff glossy areas with fine sandpaper, vacuum dust, then wipe with isopropyl alcohol for a squeaky-clean bond face. Fill chips, level seams, and ensure the substrate is fully dry. Work within the product’s recommended temperature and humidity range. Mask walls, create dust-free zones, and dry-fit pieces before peeling adhesive liners, so the overlay settles where intended without tension or hidden debris.
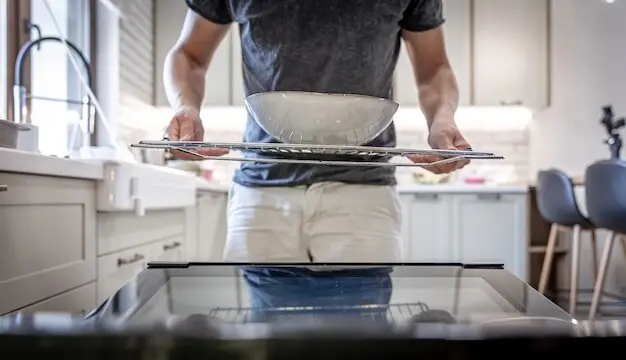
Heat and Stain Resistance
Most films tolerate warm dishes but not direct-from-oven cookware. Use trivets for pots, air fryers, and slow cookers that radiate steady heat. Pigments resist many stains, yet turmeric, beet juice, and red wine can linger when ignored. Wipe spills quickly, avoid harsh solvents, and lean on mild soap or isopropyl alcohol for stubborn marks. Preserving finish sheen is about speed, gentleness, and barriers between extreme sources and the protective topcoat.
Scratch and Impact Survival
These surfaces resist casual abrasion but lose against sharp blades and gritty impacts. Always cut on boards, especially with serrated knives that dig aggressively. Felt pads under appliances help avoid scuffs from micro-vibrations. Dropped pans may dent the base countertop, telegraphing through the film. Keep sand and crumbs under control, use soft cloths, and rotate prep zones to balance wear. Small habits compound into longer life and more consistent beauty.
Food Safety You Can Trust
A clean, sealed surface supports hygienic cooking, especially when you respect contact guidelines. Many brands highlight low-VOC finishes and phthalate-free adhesives; always confirm claims through product labels and safety data sheets. Regardless of manufacturer assurances, cutting boards and pastry mats remain smart barriers. Gentle cleaners, thorough rinsing, and quick drying prevent residues from building. With mindful routines, you keep flavors pure, protect coatings, and foster an environment where snacks, salads, and shared meals feel reassuringly safe.
Certifications and Materials
Seek overlays advertising compliance with widely recognized standards and offering transparent SDS documentation. Look for mentions of low-VOC components, phthalate-free formulations, and heavy-metal limits. Some makers note food-contact suitability for indirect use, while still recommending boards for direct cutting. If you cook frequently, prioritize brands disclosing adhesive chemistry and curing behavior. Trust grows when manufacturers share data, customers read labels carefully, and kitchens adopt habits that align with responsible, practical interpretations of safety guidance.
Cleaning Without Harsh Residues
Use mild dish soap, warm water, and microfiber cloths for everyday messes, followed by a clear-water rinse and a quick dry. For stickier oils, 70% isopropyl alcohol helps without dulling most finishes. Avoid acetone, lacquer thinner, and abrasive powders that scratch protective coats. Occasional diluted bleach can sanitize, but rinse thoroughly and ventilate well. The goal is removing contaminants while preserving sheen, texture, and adhesive integrity along edges and seams that matter most.

Hygiene Habits That Matter
Designate separate cutting boards for raw proteins and produce, wipe spills immediately, and keep sponges fresh. Prevent crumbs from collecting at backsplash lines, faucet bases, and seams by using narrow brushes or a folded towel edge. Air-dry cloths to minimize odor-causing bacteria, and periodically disinfect high-touch zones like appliance feet. These modest rituals transform overlays into reliably clean stages where meal prep feels calm, safe, and pleasantly routine, even during rushed weeknight dinners.
Color, Veining, and Scale
Natural stone patterns vary wildly, so choose prints with gentle, non-repeating veins and believable mineral flecks. Dry-fit sheets to direct patterns across long runs, ideally letting movement flow toward focal points. Order extra material to pattern-match and flip pieces as needed. Subtle contrasts hide seams better than stark lines. When the scale of veining complements counter depth, the illusion feels effortless, harmonizing backsplashes, fixtures, and morning light for a cohesive, grounded presence.
Texture and Sheen
Low-gloss, micro-embossed finishes usually read most authentic in kitchens, diffusing reflections that betray films. A gentle orange-peel or honed effect helps scatter glare while mimicking stone pores. Gloss can be dramatic yet risks plastic shine under bright LEDs. Hold samples under your actual lights, tilt them, and watch how fingerprints, water, and crumbs appear. Texture that respects daily cleanup while softening highlights keeps overlays photogenic and friendly to busy hands.
Cost, Value, and When It Makes Sense
Overlays win where budgets, timelines, and leases collide. They cost a fraction of stone, install in hours, and keep demolition dust out of life. Expect a practical lifespan measured in years, extended by gentle habits. For renters, they protect deposits when removed carefully. For homeowners, they bridge time until larger remodels. Value is the sum of aesthetics, resilience, and ease—delivered quickly—so your kitchen feels fresh without straining schedules, savings, or household patience.
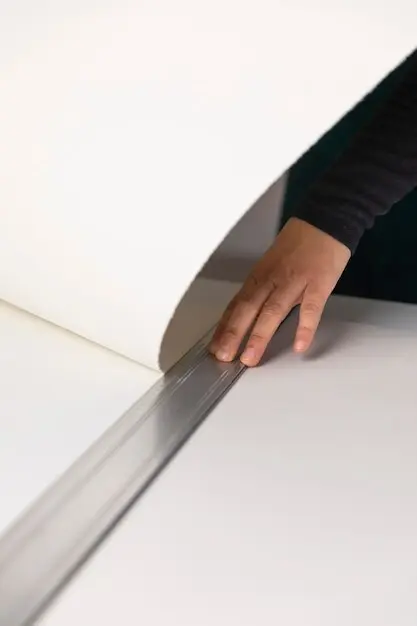
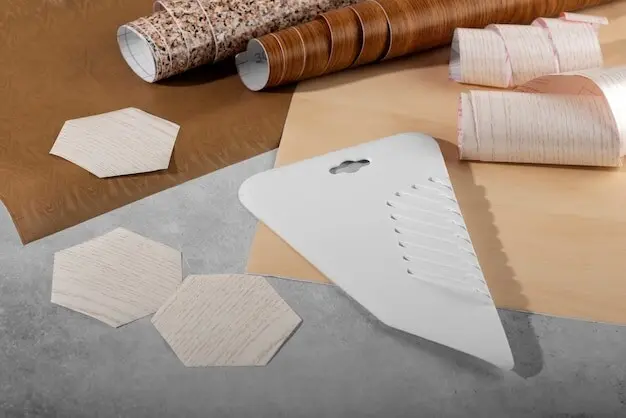
Installation Walkthrough You Can Actually Follow
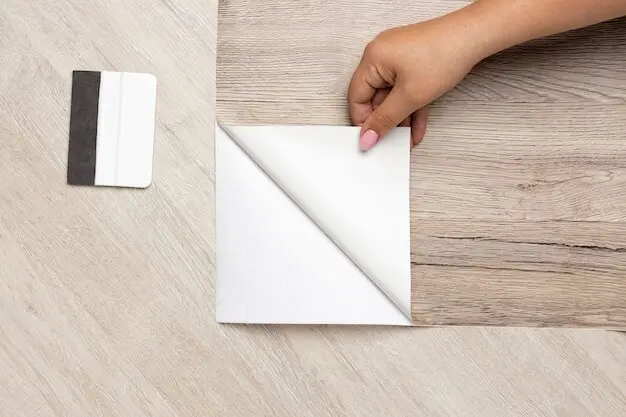
From measuring to the final edge roll, success grows from calm pacing and repeatable steps. Create a clean workspace, template tricky shapes, and align patterns before peeling. Use the hinge method, keep tension even, and work bubbles outward with felt squeegees. Gentle heat coaxes curves; frequent blade changes preserve crisp cuts. Finish with seam sealing, sink caulking, and a patient 24-hour settle period before heavy use, rewarding your care with a confident, smooth finish.
Measure Twice, Template Once
Sketch the counter, record widths, overhangs, appliance clearances, and sink positions. Use kraft paper or poster board to template complex corners and rounded edges. Label grain direction for stone veining and mark alignment arrows across seams. Add generous overlap margins for double-cutting. Lay templates on the roll to preview pattern flow, then transfer slowly, checking each mark again. Accuracy here pays dividends later, saving material and eliminating panic during final placement.
Apply, Stretch, and Roll
Tape the sheet in position to create a center hinge, peel half the liner, and begin smoothing from the hinge outward. Keep the angle shallow on your squeegee to avoid stretch creases. If needed, warm the film slightly to help it relax and conform. Work steadily, lifting and resetting small areas when bubbles or debris appear. Roll with firm, overlapping passes to seat adhesive, then repeat across the remaining half for a uniform bond.
Cutouts and Finishing Seams
For sinks and cooktops, rough-cut openings from the underside with a fresh blade, leaving small margins. Make an overlap at seams, then double-cut through both layers using a straightedge for invisible joins. Remove the waste strips, burnish carefully, and apply seam sealer if recommended. Seal sink rims and backsplash lines with smooth caulk beads. Re-roll all edges after an hour, then again later that day, reinforcing adhesion as the pressure-sensitive glue flows.
Care, Repair, and Everyday Confidence
A light, consistent routine keeps overlays photo-ready and strong. Wipe daily, dry promptly, and guard against knives and heat. Schedule monthly edge inspections and renew caulk lines as needed. Keep a labeled roll of leftover material for future patches. Most scuffs polish out with gentle cleaners and microfiber. When wear eventually shows, removal is straightforward, making room for a fresh style or a permanent countertop upgrade guided by everything you learned here.
The Weekend Rental Refresh
Maya’s rental had pitted laminate that photographed poorly for listings. She mapped patterns on Friday, installed Saturday, and baked cookies Sunday on her new marble-look surface—using boards, of course. Her landlord appreciated the reversible change, and showings doubled. A year later, she warmed an edge, lifted cleanly, and moved apartments gracefully. Her takeaway: careful prep and patient rolling turn temporary materials into surprisingly polished backdrops ready for everyday breakfasts and bold, creative weekends.

A Baker’s Bright Idea
Evan, a devoted home baker, wanted a cool, honed stone look without heavy slabs. He chose a matte overlay, added under-cabinet lights, and kept a marble pastry board for dough. Stains wiped easily, sheen stayed calm under LEDs, and photos of croissants looked editorial. He learned to double-cut seams near the sink and re-roll edges monthly. With routines locked in, his counter supported both buttery experiments and quick weekday lunches with relaxed confidence.
From Orange Oak to Modern Matte
Tasha’s inherited kitchen felt stuck in time. She paired a charcoal soapstone-look overlay with brushed brass pulls and swapped fluorescent tubes for warm strips. The pattern softened busy oak grain, and matte texture disguised crumbs between cleanings. Friends assumed a full remodel happened. A small bubble by the toaster taught her to reposition appliances and vent heat. Now, she shares budgeting tips and prep checklists with neighbors, turning one refresh into a block-wide confidence boost.
All Rights Reserved.