
Give Your Kitchen a Glow-Up with Peel-and-Stick Stainless and Color Wraps
Today we’re diving into refreshing kitchen appliances with peel-and-stick stainless and color wraps—an approachable, renter-friendly way to revive tired finishes without hauling out a single bulky replacement. You’ll discover how to select convincing brushed films and confident colors, prepare slick surfaces for strong adhesion, apply with smooth, bubble-free technique, and care for results that endure. Expect practical tips, tiny yet vital cautions about heat and steam, plus stories from real kitchens. Bring a squeegee, microfiber cloth, patience, and curiosity; by the end, your fridge, dishwasher, or microwave can wear a stylish, budget-savvy upgrade you’ll love showing off.
Prep That Makes Adhesive Magic Happen
Great wraps start long before the first cut. Clean, de-greased, and fully dry surfaces allow pressure-sensitive adhesives to lock in confidently, resisting edge lift and fingerprints. Removing handles, labeling screws, and taping reference lines builds order into your workflow. A calm pace matters just as much as the exact solvent you use, because patience keeps corners crisp, seams straight, and bubbles minimal. With the right prep habits today, your finish still looks sharp months later, even when the morning coffee rush and late-night snacks keep those doors swinging hard.
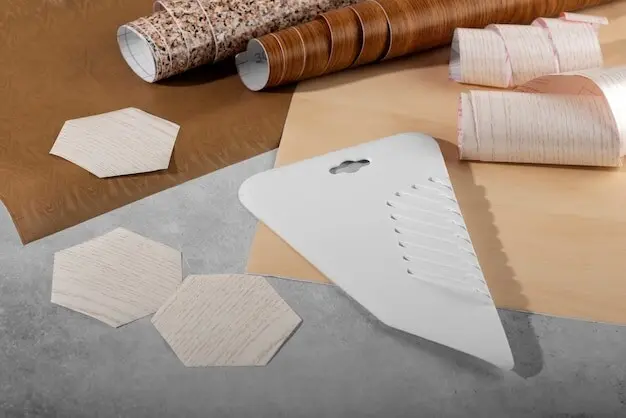
Understanding Thickness, Air-Release, and Adhesive Types
Film thickness affects confidence during squeegee passes; slightly thicker materials bridge tiny imperfections and resist stretching too thin. Air-release microchannels help bubbles escape under firm, even pressure, reducing panic moments. Repositionable, pressure-sensitive adhesives allow gentle lifts without ruining the bond. Read spec sheets for indoor durability, temperature range, and clean-removal promises. Prioritize reputable brands used in automotive or architectural wraps; consistency matters across large panels. Balanced construction saves time, protects corners, and keeps you smiling when the third cup of coffee collides with a complex curve.
Grain Direction, Sheen Levels, and Realistic Stainless Illusion
Brushed stainless illusions rely on aligned grain; vertical on tall fridge doors often feels authentic, while horizontal can visually widen a compact dishwasher panel. Compare satin, matte, and semi-gloss sheens against your lighting to avoid plastic shine. Hold samples beside real cookware and chrome fixtures to confirm undertones—some lean warm, others blue. Tiny shifts matter across big appliances. When the grain flows consistently from freezer to fridge door, the eye reads unity, and guests assume you replaced appliances, not cleverly introduced a convincing architectural film.
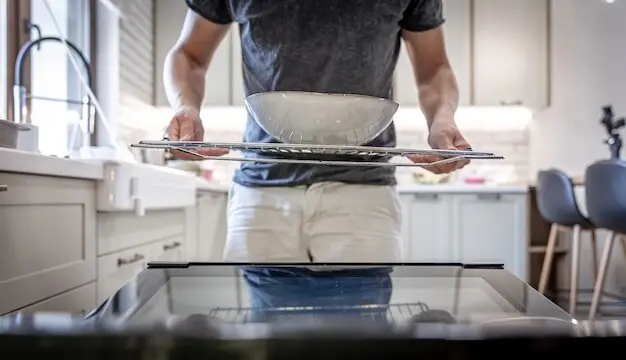
Application Techniques for Flawless Finishes
Secure one edge with tape to create a reliable hinge, align carefully, then peel backing slowly while guiding film down with firm, overlapping squeegee passes. Move from center outward to chase air toward edges. If a bubble appears, lift gently or use a soft pin prick to vent, then smooth again. Keep your squeegee felt fresh to prevent scratches. This steady rhythm avoids panic, giving you straight grain, square reveals, and confidence that you can repeat the same calm dance on the next tricky panel.
Lay knifeless tape along handles, seams, and tricky contours to slice film cleanly without touching paint. Use relief cuts in spare corners so material relaxes instead of bunching. Replace blades frequently; a sharp edge glides, a dull one drags. Support corners with your fingers to prevent accidental nicks. Always cut on backing or sacrificial tape, not appliance metal. Patience at this stage is priceless, because clean edges create the illusion of factory trim, while rough cuts instantly reveal where you rushed under pressure.
A hair dryer or low heat gun settings soften film just enough to wrap around mild curves and tight corners. Avoid overstretching; memory pulls can expose edges later. Use a roller or your squeegee’s soft edge to set heated areas smoothly. Once positioned, post-heat edges to the manufacturer’s recommended temperature to help the film stabilize. Respect safety around electronics, gaskets, and labels. The right amount of warmth makes complex geometry feel cooperative, turning stubborn corners into seamless detail rather than heartbreak spots that slowly lift.
Edges, Seams, and High-Touch Reality
Kitchens are honest environments; handles get grabbed with olive-oil fingers and dishwashers breathe steam after every cycle. Plan seams where eyes don’t linger, wrap edges with controlled tension, and use edge sealers only when manufacturer-approved. Leave breathing room near gaskets to avoid rub points. Handles and corners deserve extra squeegee time and a light post-heat. When practicality leads design choices, your handiwork survives breakfast rushes, late-night leftovers, and the occasional enthusiastic helper who thinks doors should slam to announce culinary victories.
Care, Cleaning, and Long-Term Durability
Maintenance is simple when you treat the finish kindly. Use microfiber cloths, mild soap, and gentle circular passes; avoid abrasives that haze sheen or scuff grain. Fingerprints lift easily on quality films, especially brushed steel and matte textures. Expect years of good looks with thoughtful cleaning, but also enjoy the freedom of removability when styles evolve. If edges ever whisper, a quick warm pass and firm press often restores calm. The best part: refresh again later without guilt, waste, or the price tag of new appliances.
Everyday Cleaning Without Clouding the Finish
Mix a drop of dish soap in warm water, wipe gently with microfiber, then dry with a second cloth to banish streaks. Skip harsh pads and concentrated solvents that can mar sheen or weaken edges. For tough splatters, soften first with a warm, soapy towel, not aggressive scrubbing. Always wipe along the grain on brushed films. Weekly habits prevent buildup that demands drastic measures. These tiny routines keep surfaces smiling through spaghetti nights, smoothie spills, and the curious fingerprints that mysteriously appear five minutes before guests knock.
Scratch Resistance, Kids, Pets, and Party Nights
Quality films shrug off light scuffs, but knives, rings, and wayward pet claws still deserve caution. Place trivets and cutting boards thoughtfully, especially during lively cooking sessions. Teach kids to admire with flat palms rather than curious fingernails at edges. After parties, inspect high-touch spots and give them a quick, loving pass with a squeegee-corner or felt pad. Most marks are about maintenance, not catastrophe. With a bit of tenderness, your wrap survives pizza marathons, dog tail wags, and toast dances without losing its clean composure.
Easy Removal Day: Warm, Peel Slowly, Restore Surfaces
When it’s time to change styles, warm the film gently and peel back at a low angle, moving steadily to keep adhesive with the wrap. Any residue usually wipes away with citrus cleaner or isopropyl alcohol. Work patiently around corners and hardware holes. Respect paint beneath, especially on older finishes; slow wins. A final soap-and-water rinse resets everything for a new look or a return to original. Removal day reminds you why this upgrade feels smart: freedom to evolve without landfill guilt or renovation dust.

Style Playbook: Real Kitchens, Clever Budgets, and Community Tips
Design lives in stories. A renter covered a yellowed fridge with brushed steel, spent a relaxed weekend, and texted photos that fooled everyone into believing it was new. Another pair paired matte clay doors with stainless sides for grounded warmth. Cost stayed kind; impact soared. Try color pops on microwaves, or match dishwasher panels to base cabinets. Share your photos, questions, and lessons learned. Subscribe for fresh project ideas, product tests, and seasonal palettes, so your kitchen keeps cheering you on through everyday rituals and celebrations.
We love hearing how a sleepy Friday night turned into a confident Sunday reveal. One reader labeled every panel, taped hinge guides, and queued a favorite playlist. The fridge transformed first, then the dishwasher joined the club, both wearing convincing brushed grain. Friends arrived for dinner and asked, astonished, who carried in the new appliances. That glow in the photos isn’t only reflective steel; it’s pride. Share your timeline, what surprised you, and which tool became your unexpected hero when patience briefly left the room.
If everything matches perfectly, the room can feel staged. Try stainless fronts for authenticity, then soften with colored appliance sides that echo a rug, backsplash, or bowl collection. Repeat the hue on a kettle or planter for coherence. Grain direction can guide the eye toward natural light, while matte pastels warm strict minimalism. Even a single wrapped microwave beside open shelves can tilt the whole composition friendlier. Photograph mockups with painter’s tape before committing. Small, brave choices often unlock giant personality without overwhelming your calm morning routines.
All Rights Reserved.